Contents:
- The Foundation: Understanding Men’s Hair Types and Growth Patterns
- Essential Tools: What You Actually Need
- Setting Up Your Workspace and Positioning
- The Step-by-Step Cutting Technique
- Step One: Consultation and Preparation
- Step Two: Establishing Length with Clippers
- Step Three: Creating Defined Lines
- Step Four: Scissor Work on Top
- Step Five: Blending and Detailing
- Common Mistakes and How to Avoid Them
- Mastering Different Hair Types
- Straight Hair
- Wavy Hair
- Curly Hair
- Timing, Maintenance, and Growth Patterns
- A Personal Experience: When Learning Transforms Perspective
- Pro Tips from Experienced Stylists
- Troubleshooting Common Problems
- Uneven Length
- Harsh Line Between Clipped Sides and Scissor Top
- Back of Head Looks Lumpy or Uneven
- Hair Looks Choppy Rather Than Textured
- Clipper Lines Are Visible and Harsh
- Frequently Asked Questions
- How often should I cut someone’s hair?
- Can I cut curly hair dry?
- What’s the difference between a fade and a taper?
- How do I know if my clippers are dull?
- Should I cut hair wet or dry?
- Building Confidence Through Practice
- Moving Forward
It’s Sunday afternoon, and your partner asks if you can trim his hair before his Monday meeting. Your heart sinks. The barber’s chair feels like a luxury you can’t afford every few weeks, and watching your monthly budget disappear on £25-30 cuts stings more than it should. This moment—when you realise you could learn to do this yourself—marks the beginning of a surprisingly rewarding skill.
Learning how to cut men’s hair transforms the way you approach grooming in your household. It’s not just about saving money, though the financial relief is genuine. It’s about understanding the mechanics of hair, gaining confidence with tools, and delivering results that rival your local barber. Whether you’re cutting your own hair, helping family members, or considering this as a side skill, this guide breaks down everything you need to know to get started.
The Foundation: Understanding Men’s Hair Types and Growth Patterns
Every successful haircut begins with observation. Men’s hair comes in several distinct categories, each with its own cutting requirements and challenges. Straight hair tends to be more forgiving—it sits predictably and responds consistently to blades. Wavy hair adds texture; it springs and moves differently depending on moisture and styling products. Curly hair requires the most precision because curls shrink as they dry, meaning a cut that looks perfect when wet can surprise you once it’s dry.
Beyond texture, density matters enormously. Thick hair—which typically refers to the diameter of individual strands rather than the number of hairs on the scalp—demands sharper blades and more deliberate cutting techniques. Fine hair, conversely, risks looking thin or wispy if you remove too much bulk. A cut that works beautifully on thick hair can leave fine hair looking sparse.
Hair growth patterns are equally crucial. The crown tends to grow at different angles than the sides. The nape—the back of the neck—often has hair that grows downward rather than outward, which affects how you’ll taper the back. Understanding these natural patterns means you cut with the grain rather than against it, producing cleaner results and reducing damage.
Essential Tools: What You Actually Need
Professional barbers spend £150-400 on quality clippers alone. You don’t need that investment to start, but you cannot use kitchen scissors or regular hair scissors. The difference is cutting angle and material. Professional hair scissors maintain a precise blade edge; they’re angled specifically for clean cuts rather than crushing hair (which causes split ends). A quality pair of 6-inch professional scissors costs £40-80 from UK suppliers like Wahl or Andis.
Clippers are your second essential tool. Corded clippers are more reliable than battery-operated ones because they maintain consistent cutting power throughout use. A decent corded clipper set from brands like Oster or Wahl runs £50-120 and includes multiple guard sizes. The guard is the plastic comb attachment that determines cutting length—a number 1 guard cuts hair to approximately 3mm, while a number 4 guard cuts to about 13mm.
Your toolkit also requires:
- Thinning shears (£25-50): These have teeth on one blade rather than a straight edge, removing bulk without creating harsh lines
- Spray bottle (£3-8): Damp hair is easier to cut than dry hair; water helps clippers glide smoothly
- Comb with fine and wide teeth (£8-15): Different sections need different combing techniques
- Clipper oil and brush (£8-12): Maintains blade sharpness and extends tool lifespan
- Cape or towel (£5-12): Protects clothing and makes cleanup easier
Investment in decent tools is non-negotiable. Dull clippers and cheap scissors don’t cut hair—they pull and damage it, leaving the hair looking ragged rather than fresh. After your initial £100-200 investment, you’ll recoup that cost within 6-8 cuts if you’re paying £25+ per barber visit.
Setting Up Your Workspace and Positioning
Location matters more than most people realise. A bathroom with a mirror is standard, but a space with two mirrors—one in front and a handheld mirror behind—lets you see the back of the head accurately. Ensure the lighting is bright and even; shadows hide problems. Natural daylight near a window, combined with a clip-on lamp, gives you the clarity needed to spot uneven lines.
The person being cut should sit in a sturdy chair, ideally one without wheels that might roll unexpectedly. Their head should be at a comfortable height—roughly your chest level when you’re standing. Posture matters: the head should stay relatively still and upright. If someone’s head tilts to one side, the cut becomes uneven because you’re essentially working on a tilted surface.
For your own hair, the challenge intensifies. A handheld mirror plus your bathroom mirror creates a reflection system that works—you see the front in the bathroom mirror and the back in the handheld mirror. Cutting your own hair takes 50% longer than cutting someone else’s because you’re constantly repositioning to check different angles. Accept this before you start.
The Step-by-Step Cutting Technique
Step One: Consultation and Preparation
Before a single hair falls, discuss the desired style. The most common men’s cuts follow these categories: short tapered sides with longer length on top (the textured quiff or crop), all-over uniform short (the crew cut or buzz cut), or longer on top with a defined part (the classic side-part). Ask what the person wants to achieve and, crucially, show pictures from the same angle and lighting as your workspace.
Dampen the hair thoroughly with your spray bottle. Hair stretches when wet and sits more predictably. You’ll trim slightly longer than the final dry length because wet hair pulls down from the scalp; as it dries and recovers, it will be about 3-5mm shorter than your cuts. This is why beginning barbers often cut too short—they don’t account for this shrinkage.
Step Two: Establishing Length with Clippers
Start on the sides and back using the largest guard that matches your target length. For a typical men’s style, this might be a number 2 or 3 guard. Hold the clipper flat against the skin and move it upward in smooth, steady strokes. Overlap each stroke slightly; clippers work by cutting only the hair that presses between the guard and blade, so coverage gaps create uneven patches.
Work up from the nape toward the temples. Make one complete pass up each side, then a second pass to ensure you’ve caught everything. The goal at this stage is not perfection—it’s establishing a baseline length. You’ll refine it next.
For the back of the head, enlist a handheld mirror or ask your subject to look in the main mirror while you work. Never cut the back blind; you’ll create uneven sections or lines. Work from the nape upward, blending as you go.
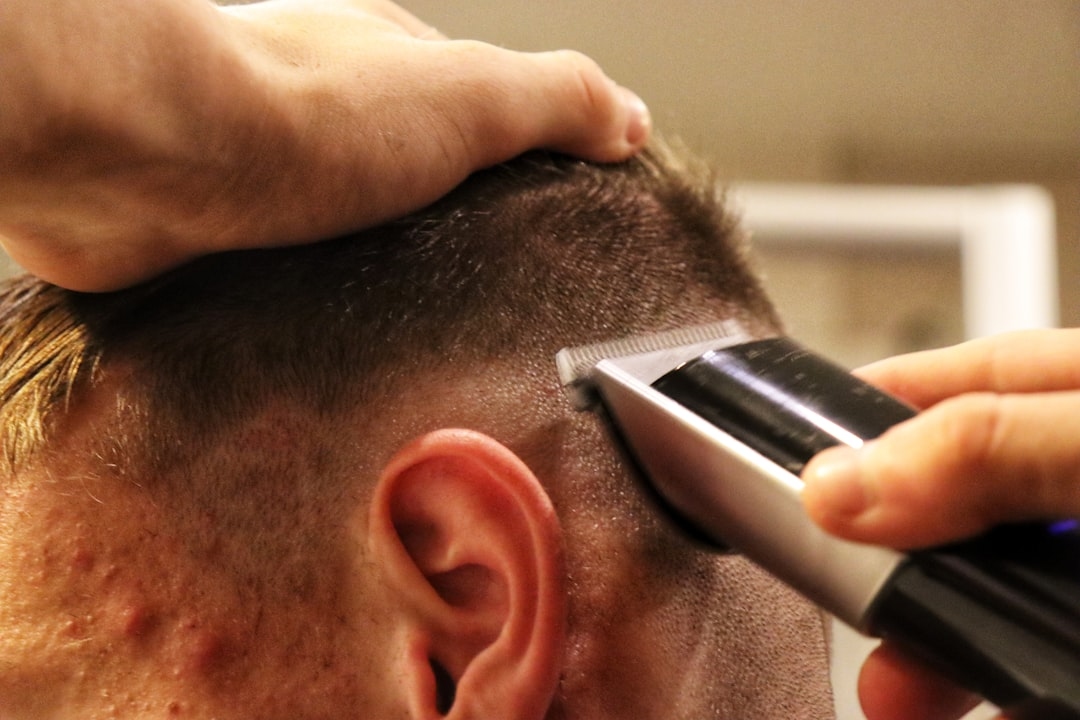
Step Three: Creating Defined Lines
Switch to a smaller guard—typically a number 0 or 1—to create sharper definition. This guard is used along the edges: around the ears, along the sideburns, and at the nape. These areas get faded down to very short length, creating visual definition that makes the cut look intentional and shaped.
The technique changes here. Instead of moving the clipper straight upward, use a blending motion. Start with the small guard at the base and move upward at a slight angle, gradually peeling away the guard as you go up. This creates a seamless gradient from very short at the base to longer length above. It’s the difference between a choppy, amateurish look and a professional fade.
Step Four: Scissor Work on Top
This is where technique truly matters. Comb the hair on top backward and upward to establish the direction it will sit. Hold the scissors at a slight angle—not perfectly vertical, but not completely horizontal either. The 45-degree angle is a rough guide.
Take small sections, about the width of your comb, and cut with one deliberate motion rather than sawing back and forth. Comb up to check length, then cut again if needed. Work across the top from front to back, making each section slightly longer toward the back. This creates a natural-looking crown that sits well.
A common mistake: cutting straight across the top creates harsh lines. Instead, angle your cuts to create a subtle shape. For curly hair, cut while the hair is damp and the curls are relaxed; this gives you accuracy you’d lose if you cut dry curls.
Step Five: Blending and Detailing
Use thinning shears to remove bulk from the top if needed, especially for thick hair. Thinning shears work differently than regular scissors—they only remove some of the hair in each cut, creating a textured look rather than a blunt line. Use them sparingly; a few strategic passes are better than overdoing it.
Blend the transition between clipped sides and scissor-cut top. Comb the top hair down over the sides, then use scissors to trim any pieces that stick out. This creates a smooth gradient rather than an obvious line of demarcation between two distinct lengths.
Common Mistakes and How to Avoid Them
The most frequent error is cutting too short on the first pass. There’s no undo button with hair; it grows back in 4-6 weeks. Cut conservatively, then adjust upward if needed. A good rule: cut to three-quarters the length you think you want, assess, then make the final length decision.
Uneven sides are the second common issue, usually because people work too fast or don’t maintain consistent technique on both sides. Slow down. Compare sides frequently by combing back and looking in the mirror. Your non-dominant hand might produce slightly different results than your dominant hand; compensate by checking more often when using your weaker hand.
Clippers held at the wrong angle produce uneven cuts. The blade must run parallel to the scalp; tilting the clipper creates high and low spots. If you’re feeling resistance when clipping, the blade angle is probably wrong. Adjust until the clipper glides smoothly.
Not tapering the nape correctly leaves the cut looking unfinished. The hair at the very bottom of the neck should fade to skin. If you leave a straight line of longer hair at the nape, the entire cut looks amateur. Take extra time on this small area—it matters disproportionately.
Mastering Different Hair Types
Straight Hair
Straight hair is the most forgiving texture. Your cuts show clearly because the hair sits where you place it. The tradeoff: mistakes are equally visible. Straight hair benefits from sharp clipper lines and defined blending. Use clippers for structure and let scissors handle texture on top.
Wavy Hair
Wavy hair requires accounting for movement. Cut slightly longer than for straight hair because waves create the illusion of fullness. When wet during cutting, wavy hair appears straighter than it will dry, so expect some spring-back. Fade the sides cleanly; the movement on top will create enough texture without additional thinning.
Curly Hair
Curly hair demands the most precision and the most patience. Cut while damp, not soaking wet. Curls shrink noticeably—a quarter-inch seems insignificant until the hair dries and shrinks half an inch total. Always cut longer than your target when working with curls. Remove bulk with clippers on the sides; on top, use point-cutting or thinning shears rather than blunt scissors. Point-cutting means holding scissors vertically and making small cuts into the hair rather than cutting across it, creating texture and removing bulk simultaneously.
Timing, Maintenance, and Growth Patterns
Men’s haircuts need refreshing every 3-4 weeks to maintain shape, especially if the sides are short and faded. The top grows at roughly 6mm per month, meaning a cut that looked perfect week one appears noticeably longer by week three. Plan cuts around important events, knowing the fresh cut will last most of a month before becoming shaggy.
Between cuts, maintaining tools is essential. Clippers dull with use, especially if they’re not cleaned and oiled regularly. After each use, brush out hair clippings and apply a small amount of clipper oil to the blades. This extends blade life from perhaps 30-40 cuts to 80+ cuts. Oil costs £4-6 and is cheaper than replacing blades.
Hair styling products and the person’s daily hair care routine affect how a cut looks long-term. A textured crop cut styled with matte clay or pomade looks dramatically different than the same cut left unstyled. Discuss styling with the person being cut so they understand how to present their hair at its best.
A Personal Experience: When Learning Transforms Perspective
James, a software engineer in Bristol, initially cut his partner’s hair out of necessity during the 2020 lockdowns. His first attempts were tentative, resulting in uneven sides and too-short fades. But he persisted, watched instructional videos, and practiced on family members who were forgiving. By cut number ten, something shifted. His clipping technique became muscle memory; his eye for balance improved dramatically. Two years later, he estimates he’s saved his household over £1,200 by handling his own and his partner’s cuts. More importantly, he discovered a meditative quality in the work—the focus required pushed away daily stress. What started as a pandemic necessity became a genuine skill and a meaningful way to care for the people he loves. His story illustrates a simple truth: this isn’t a skill reserved for professionals. It’s learnable, improvable, and deeply rewarding.
Pro Tips from Experienced Stylists
Marcus Chen, a trichologist and salon owner in London with 15 years’ experience, offers this insight: “Most home barbers focus too much on clippers and not enough on precision scissors work. The clippers establish foundation, but scissors create personality. A clipper cut looks mechanical; scissors work, even if imperfect, looks intentional.” This perspective shift—from viewing scissors as a secondary tool to central—elevates beginners’ results noticeably within a few cuts.
Another tip from experienced stylists: patience with the learning curve matters more than any single technique. Your first five cuts will be rough. By cut fifteen, you’ll see dramatic improvement. By cut thirty, muscle memory carries you through most decisions. Give yourself grace in the early stages; every professional barber struggled with basic technique at first.
Troubleshooting Common Problems
Uneven Length
Solution: Take smaller sections and cut less each time. Large sections hide unevenness until you step back. Working in small portions gives you constant visual feedback.
Harsh Line Between Clipped Sides and Scissor Top
Solution: Blend more deliberately. After clipping the sides and cutting the top, comb everything together and use scissors to create transition. The goal is no visible line.
Back of Head Looks Lumpy or Uneven
Solution: Use two mirrors to see the back clearly. Make multiple passes rather than trying to perfect it in one. Work systematically from the nape upward, checking after each section.
Hair Looks Choppy Rather Than Textured
Solution: You’re using regular scissors on textured styles. Switch to thinning shears for texture, or use point-cutting technique (scissors held vertically, making small cuts into the hair).
Clipper Lines Are Visible and Harsh
Solution: Blend better. Hold the clipper at a slight angle and gradually peel away the guard as you move upward. This gradient hides clipper lines.
Frequently Asked Questions
How often should I cut someone’s hair?
For short men’s styles with faded sides, every 3-4 weeks maintains the intended shape. Longer styles (where the top is several inches long) can go 6-8 weeks between cuts. Growth rate averages 6mm monthly, so plan accordingly.
Can I cut curly hair dry?
Not recommended. Curly hair is unpredictable when dry—curls spring in different directions and obscure your actual cutting line. Damp curly hair straightens enough for you to see what you’re doing, but it will shrink as it dries, so account for that shrinkage when determining final length.
What’s the difference between a fade and a taper?
A fade is a more dramatic gradient from very short at the base to longer on top; it typically covers a larger area. A taper is a more subtle length transition, often over a smaller area like the sides or back. Fades are more contemporary and require more blending skill. Tapers are gentler and more forgiving for beginners.
How do I know if my clippers are dull?
Dull clippers pull or tug on hair rather than cutting cleanly. If you feel resistance and see small hairs being pulled rather than cut, the blades are dull. Sharp clippers glide smoothly with minimal resistance. Dull clippers can also cause clipper burn—irritation from the pulling action—so don’t use dull clippers longer than necessary.
Should I cut hair wet or dry?
Cut wet. Wet hair is easier for clippers to glide through, and scissors cut wet hair more cleanly. However, account for shrinkage—hair is roughly 3-5% shorter when dry than when wet. Cut slightly longer than your intended final length.
Building Confidence Through Practice
Learning how to cut men’s hair is a cumulative skill. Your first cut won’t be professional-quality; that’s normal and expected. Your fifth cut will be noticeably better. By cut twenty, you’ll have internalized most technique. The key is starting with realistic expectations and accepting the early imperfection as part of the process.
Start by cutting people who trust you and are forgiving—family members, close friends, or yourself. Choose simpler styles for your early attempts: a basic fade or crew cut is forgiving because you’re using clippers on most of the head. Save complex styles with lots of scissor work for when you’ve built foundational confidence.
Document your progress. Photograph each cut from the same angle and in the same lighting. Looking back at photos reveals improvements you won’t notice day-to-day. It’s motivating and instructive—you’ll see exactly what you’ve improved and where you still need focus.
Moving Forward
Mastering how to cut men’s hair opens possibilities. You can save significant money, provide a genuine service to people you care about, and develop a genuinely useful life skill. The investment in tools is modest; the time investment is reasonable. More importantly, you’re learning a skill that compounds with every cut you make.
Whether you’re motivated by cost savings, a desire to help family, or the satisfaction of learning something tangible, the path forward is the same: invest in decent tools, start with simpler styles, practice consistently, and adjust your technique based on results. Within a few months, you’ll confidently cut men’s hair in your own home—and you’ll wonder why you didn’t start sooner.