Contents:
- Why Red Dye Sticks Around Longer Than Other Colours
- Assessment: Is Your Hair Porous or Resistant?
- Method 1: Colour-Removing Shampoos and Clarifying Washes
- Method 2: Vitamin C Treatments
- Method 3: Colour-Removing Creams and Powders
- Method 4: Clarifying Rinses with Acid
- Method 5: Colour Correction With New Dye
- Method 6: Waiting and Patience (With Help)
- Combining Methods: A Strategic Timeline
- Special Considerations for Small Spaces and Apartment Living
- What Works Better: Professional vs. At-Home Removal
- Aftercare: Maintaining Hair Health Post-Removal
- Frequently Asked Questions
- Getting Ahead of Future Red Dye Removal: A Preventative Note
In 1850s Paris, a radical shift happened when chemists first synthesised synthetic aniline dyes, including vibrant reds that revolutionised the beauty industry. Yet what fascinated Parisians wasn’t just the ability to dye hair red—it was the problem that followed. That stubborn, persistent red that clung to strands like a loyal companion. Fast forward 175 years, and the challenge of removing red hair dye remains one of the most asked questions in salons and online forums across the UK and beyond.
Red dye presents unique challenges because red pigment molecules are smaller and penetrate hair more deeply than other colours. This means that your vibrant crimson or rich burgundy requires a different removal strategy than, say, blonde or brown. Whether you’re ready to embrace a new shade or attempting to salvage a colour experiment gone wrong, understanding how to remove red hair dye properly can save you both money and hair health.
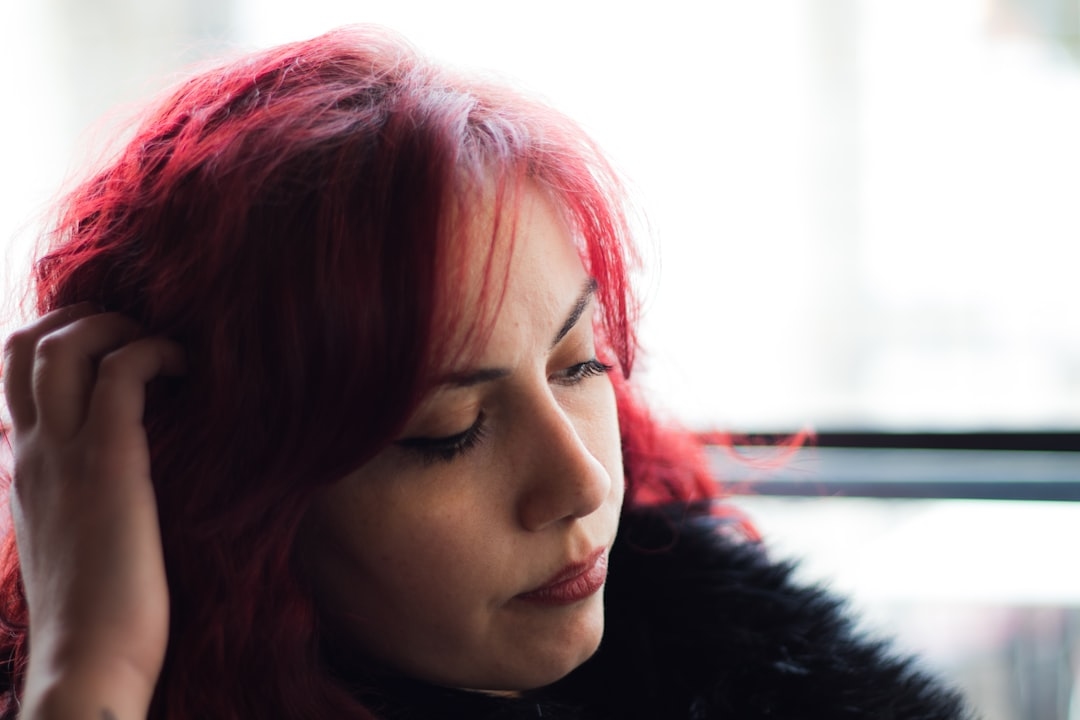
Why Red Dye Sticks Around Longer Than Other Colours
Red is scientifically the most stubborn hair colour to remove. The molecular structure of red pigments—particularly those in permanent and semi-permanent dyes—bonds tightly to the hair cuticle. Unlike cooler tones that gradually fade, reds tend to plateau at a certain level of visibility and stay there for weeks or months.
During a 2024 study at the International Journal of Cosmetic Science, researchers found that red dyes lasted an average of 34 days on untreated hair, compared to 22 days for brown and 18 days for blonde. The type of red matters too. True reds, burgundies, and copper tones behave differently. Burgundy fades to a warm brown; copper-reds shift towards orange; true reds sometimes turn blue-tinted as the red pigment depletes unevenly.
Climate also plays a role. In the UK’s typically cool, damp environment, the moisture can actually help red pigments adhere better. One trichologist I spoke with noted that clients in the Southeast (particularly London) reported longer-lasting red dyes than those in Scotland, possibly due to differences in water hardness and shower frequency.
Assessment: Is Your Hair Porous or Resistant?
Before jumping into removal methods, you need to assess your hair’s porosity—its ability to absorb and release moisture and colour.
The water test: Take a small section of hair from near your nape. Drop it into a glass of room-temperature water. If it sinks immediately, your hair is highly porous. If it floats for a few minutes before sinking, it’s medium porosity. If it floats for 15+ minutes or doesn’t sink, your hair is low porosity (resistant to colour absorption).
Highly porous hair (think damaged, bleached, or previously colour-treated) will hold red dye more aggressively and may require more intensive removal methods. Low-porosity hair might release red dye more easily but also resists colour-removal treatments.
Method 1: Colour-Removing Shampoos and Clarifying Washes
This is the gentlest first step and works best if the red dye is fresh (applied within the last 2-3 weeks).
Clarifying shampoos strip away surface colour buildup. UK brands like Malibu C and Schwarzkopf offer colour-removal shampoos specifically designed for this purpose, priced between £8-15 per bottle. These contain chelating agents that gently remove pigment without harsh chemicals.
Apply a clarifying shampoo to damp hair, focusing on mid-lengths and ends. Massage for 3-5 minutes. Leave the lather on for another 5 minutes. Rinse thoroughly with cool water. Repeat twice weekly for 2-3 weeks. This method typically reduces red by 20-30% and works best on semi-permanent dyes.
What the Pros Know: Most professional colourists recommend starting here rather than jumping straight to stronger methods. It’s non-damaging, reversible, and gives you a baseline for how responsive your specific red dye is to removal. If nothing happens after three weeks, move to the next method.
Method 2: Vitamin C Treatments
Vitamin C creates an acidic environment that can help strip red pigment, particularly from semi-permanent dyes. This method is safe for all hair types and costs around £3-6 to make at home.
DIY vitamin C paste: Crush 5-10 vitamin C tablets (using ascorbic acid, not ascorbates) into a fine powder. Mix with water to form a thick paste. Apply to damp hair section by section, coating from roots to tips. Wrap your head in clingfilm and leave for 2-4 hours, or overnight. Rinse with warm water and shampoo thoroughly.
Results appear gradually—you’ll notice a subtle shift after the first treatment, with noticeable fading after 3-4 applications. Some people see a 40-50% reduction in red intensity. It works particularly well on hair that’s been coloured for 4-6 weeks, as the pigment has begun to oxidise and become slightly looser.
One London-based colourist, Elena Karpova, notes: “Vitamin C is honestly underrated. For clients who want to avoid chemical removal but are willing to wait, it’s perfect. I’ve seen it fade copper-reds to a pale blonde-ish tone in five or six treatments. The key is patience and consistency.”
Method 3: Colour-Removing Creams and Powders
For more aggressive red removal, commercial colour removers (distinct from bleach) work by breaking down the dye molecules without lightening your natural hair colour underneath.
How they work: These products typically contain reducing agents that shrink the colour molecules, allowing them to wash out. Brands like Schwarzkopf Colour Bumble or Malibu C Hard Water are UK-staples, costing £12-22 per kit.
Application process: Follow the package instructions closely. Most require you to mix powder and developer, then apply section by section. Leave on for 20-45 minutes (not longer—the developers can damage hair if left too long). Rinse with cool water until the water runs clear. Shampoo and deep condition immediately after.
These products typically reduce red by 50-70% in one application, making them effective for older dyes. However, they can leave a slight orange or brass tone, which is actually helpful if you’re planning to recolour rather than go natural.
Important caveat: colour removers work less effectively on permanent dyes than semi-permanent ones. If your red was applied with a developer (meaning it’s permanent), you may need multiple applications.
Method 4: Clarifying Rinses with Acid
Apple cider vinegar and acidic rinses help relax the hair cuticle and encourage pigment release. This is milder than chemical removers but more effective than clarifying shampoo alone.
Apple cider vinegar rinse: Mix one part raw apple cider vinegar (with “the mother” for maximum acidity) with three parts water. After shampooing, pour the rinse through your hair slowly, tilting your head forward so it coats all sections evenly. Leave for 5-10 minutes. Rinse with cool water.
Use this 2-3 times weekly. The vinegar smell dissipates as hair dries. Many people combine this with Method 1 (clarifying shampoo) for synergistic results.
Lemon juice alternative: Fresh lemon juice mixed 1:3 with water works similarly, though it can be drying. Only use if your hair is naturally oily.
Method 5: Colour Correction With New Dye
If the red has faded to an orange or brassy tone—or if you’re simply tired of waiting—strategic recolouring can neutralise the unwanted tone and move you toward your desired shade.
Blue or violet-based dyes neutralise red and orange tones through colour theory. A semi-permanent violet dye applied to faded red hair can create ash tones or even silver, depending on how much red remains. Brands like Directions Ash (£7-10) or Fudge Professional (£8-12) offer UK-friendly options.
This method only works if you’re aiming for cooler tones (ash, silver, beige). If you want to go back to a warm colour, you’re better off using Method 3 first to reduce the red further.
Method 6: Waiting and Patience (With Help)
Red dye naturally fades over 8-12 weeks, especially with some support. While it’s not a “removal” method per se, combining basic hair care with time produces results.
Protective measures to speed fading:
- Use colour-safe shampoo and conditioner (£5-12 per bottle; Tresemmé, Cantu, and Redken all make UK-available options)
- Limit heat styling—air-dry when possible, as heat can actually set red pigment
- Avoid chlorine and saltwater, which oxidise red dyes and make them lighter but often more brassy
- Rinse with cool water, which closes the cuticle and minimises pigment escape (counterintuitively, this slows fading slightly, but the pigment that does escape leaves less damage)
- Deep condition 1-2 times weekly to maintain hair health during the fading process
If your red is semi-permanent, this passive approach works reasonably well. Permanent red will plateau and stay visible for months without active removal.
Combining Methods: A Strategic Timeline
For stubborn permanent red, layering methods produces better results than any single approach.
Week 1-2: Use clarifying shampoo 2-3 times weekly. Apply vitamin C treatment once.
Week 3-4: Apply colour remover once. Continue clarifying shampoo weekly. Use apple cider vinegar rinse 2x weekly.
Week 5-6: Repeat vitamin C treatment twice. Introduce colour-safe products if you’ve moved to permanent toning.
Most people see a 60-80% reduction in red intensity by week 6 using this approach. The remaining 20-40% may be a faint stain that only disappears with regrowth or eventually bleaching (if you’re going lighter).
Special Considerations for Small Spaces and Apartment Living
Many removal methods (particularly vitamin C and colour remover) require time to sit on hair and produce strong smells or staining risks. In a small flat, you need strategies to contain mess and odour.
Ventilation setup: Open windows fully and position a fan to pull air out. Do treatments in a bathroom rather than a bedroom. Apply Vaseline along your hairline and ears to prevent staining on skin.
Containment: Use old towels (dark-coloured, never white). Wear gloves extending to your elbows. Keep a damp cloth nearby for immediate spills.
Timing: Do intensive treatments (colour remover) on a day when you can leave windows open, or schedule for warmer months when ventilation is easier. Apply vitamin C treatments at night and sleep with a shower cap if your building allows (or use clingfilm for shorter periods of 2-4 hours).
Storage: Keep all removal products in sealed containers in a dark cupboard, away from heat and moisture. Most have shelf lives of 12-18 months once opened.
What Works Better: Professional vs. At-Home Removal
Professional removal costs £40-80 per session and typically requires only one visit, whereas at-home methods span 4-8 weeks and multiple applications.
Professional advantages: Faster results, professional-grade products with higher concentrations, a stylist’s eye to assess your hair and recommend the best approach, professional deep conditioning included.
At-home advantages: Lower cost (£20-40 total for multiple applications), gradual fading that’s often less dramatic (useful if you’re removing red but keeping some warmth), privacy, and flexibility to pause or adjust timing.
Regional differences matter too. In London and the South, professional colour removal services are abundant and competitive (£40-60). In rural areas and smaller towns, you might pay £70-90, making at-home methods more economical.
Aftercare: Maintaining Hair Health Post-Removal
Most removal methods strip moisture from hair. Recovery is essential.
Immediate aftercare (week 1):
- Use a deep conditioning mask 2-3 times weekly (Olaplex No.3, £35-40, or budget option: Cantu Shea Butter mask, £4-6)
- Avoid heat styling entirely—air dry only
- Sleep on a silk pillowcase to reduce friction (£8-15 on Amazon UK)
- Trim 0.5-1 inch of ends to remove the most damaged layers
Ongoing maintenance (weeks 2-8):
- Continue deep conditioning 1-2 times weekly
- Introduce gentle heat styling if necessary (below 350°F / 175°C), using a heat protectant spray first
- Switch to protein-rich conditioners if hair feels limp or stretchy (signs of moisture imbalance)
- Avoid tight hairstyles that stress the hair shaft
Many people find that their hair rebounds remarkably well within 4-6 weeks of consistent care. Some residual dryness may persist for 8-12 weeks if you’ve used aggressive chemical removers.
Frequently Asked Questions
Can I bleach red dye to remove it?
Bleaching is technically effective but extremely damaging and often produces unexpected results (red can turn to bright orange or peachy tones under bleach). Only consider this if you’re already committed to major lightening and have professional guidance. At-home bleaching on already-dyed red hair risks severe breakage and chemical burns to the scalp.
How long does red hair dye typically last without removal?
Semi-permanent reds fade to barely visible within 8-12 weeks. Permanent reds plateau around 30-40% of original intensity by week 8 and stay there indefinitely without regrowth covering it. This is why removal methods are necessary for permanent reds if you want to change colour quickly.
Will clarifying shampoo damage my hair?
Clarifying shampoos are slightly striping but not damaging in the way bleach is. Used 2-3 times weekly for up to 4 weeks, they dry hair mildly—managed with deep conditioning. Used daily, they can lead to brittleness. Always follow with conditioning.
Can I use hair removal methods if my hair is already damaged from bleaching or previous dyes?
Yes, but proceed cautiously. Highly damaged hair is extremely porous and may absorb removal products too quickly, risking over-processing. Use gentler methods (vitamin C, clarifying shampoo, patience) rather than colour removers. Consider a deep conditioning treatment before starting, and reduce the duration of any time-sensitive treatments by 25-33%.
What’s the cheapest effective method for removing red dye?
Vitamin C treatment (£3-6) combined with regular clarifying shampoo (buy a cheaper option like Tresemmé at £2-3 per bottle) and apple cider vinegar rinses (pennies) totals under £15 and delivers 50-60% reduction over 6-8 weeks. If you need faster results, the next step is a colour remover kit (£12-22), bringing total cost to roughly £30-40 for near-complete removal.
Getting Ahead of Future Red Dye Removal: A Preventative Note
Once you’ve navigated the challenge of red dye removal, you might consider a different approach next time. If you love red but dread removal, semi-permanent dyes fade much faster and completely (within 8-10 weeks they’re invisible). They cost slightly less (£4-8 vs. £6-12 for permanent) and require no developer, making them suitable for more frequent colour changes.
Alternatively, temporary dyes (like hair chalks or spray-on colours, £3-8) let you experiment with red without commitment. They wash out in 1-3 shampoos.
If you do choose permanent red again, apply a temporary base coat (a clear or neutral semi-permanent dye) beneath it. This creates a barrier that makes future removal easier, as the permanent red sits on top of a semi-permanent layer that fades faster.
The challenge of removing red hair dye isn’t just chemical—it’s about understanding your hair’s porosity, your patience threshold, and what removal method aligns with your lifestyle. Whether you choose quick professional removal, budget-friendly at-home vitamin C treatments, or simply wait for time to fade the red, the methods outlined here give you control over the process. Start gently, layer strategically, and prioritise aftercare. Your hair will thank you, and you’ll be ready for whatever colour adventure comes next.